Clay Bricks Manufacturing
Learn the complete process of making durable clay bricks for construction.
Materials & Tools Needed
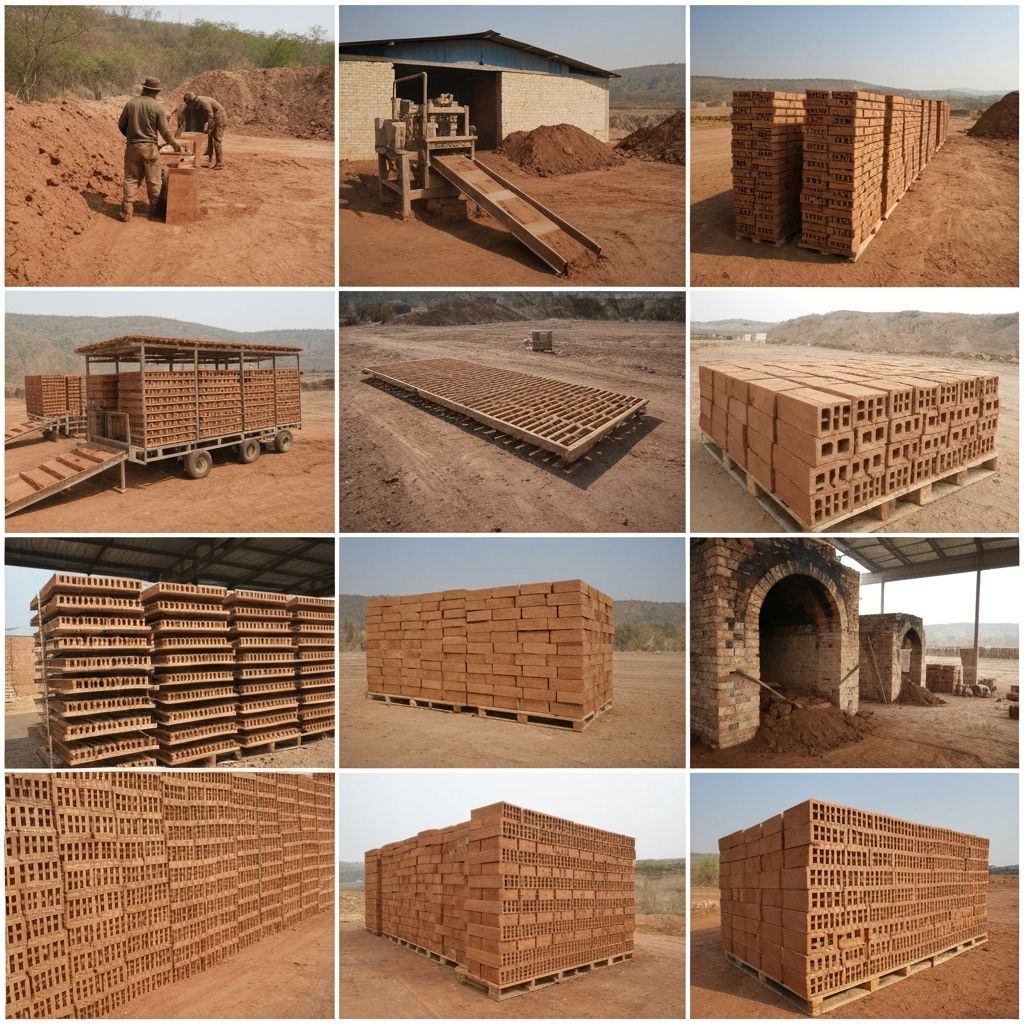
Step-by-Step Instructions
Source Quality Clay
Identify and extract clay-rich soil, preferably from depths of 3-6 feet below surface. The clay should be plastic and sticky when wet.
Test Clay Quality
Perform a simple ribbon test: roll moist clay into a thin strand. Quality clay forms a ribbon 2-3 inches before breaking.
💡 Pro Tip
Clay with too much sand won't hold shape; too much silt causes cracking.
Remove Impurities
Spread clay out and manually remove rocks, roots, and organic matter. Larger operations may use a pug mill for this process.
Weather the Clay
Expose clay to weather elements for several weeks. Freezing and thawing cycles help break down clay particles for better workability.
Add Sand Mixture
Mix in sand at a ratio of about 25-30% to prevent excessive shrinkage and cracking during drying. Mix thoroughly until uniform.
Add Water and Temper
Add water gradually while kneading the clay mixture. The clay should be plastic and moldable but not sticky. This is called tempering.
💡 Pro Tip
Allow tempered clay to rest for 24 hours for even moisture distribution.
Prepare Brick Molds
Sand or oil wooden brick molds to prevent sticking. Standard brick size is 8×4×2.25 inches, but account for 10% shrinkage.
Form the Bricks
Press tempered clay firmly into molds, removing air pockets. Strike off excess clay level with the mold top using a wire or stick.
Unmold Green Bricks
Carefully remove newly formed bricks from molds. Place them on flat boards or pallets in a protected drying area.
Initial Drying
Let bricks air dry for 2-3 days in shade, protected from direct sunlight and rain. This prevents surface cracking from rapid drying.
Turn and Continue Drying
After initial drying, turn bricks on their sides to expose all surfaces. Continue drying for another 3-4 days until moisture content is reduced.
Final Drying
Stack bricks in a criss-cross pattern allowing air circulation. Complete drying takes 1-2 weeks depending on weather. Bricks should feel light and ring when tapped.
Load the Kiln
Carefully stack dried bricks in a kiln with small gaps for heat circulation. Traditional kilns are packed in specific patterns for even firing.
💡 Pro Tip
Place more porous or damaged bricks in cooler areas of the kiln.
Fire the Bricks
Heat kiln gradually to 1800-2000°F over 24-48 hours. Maintain peak temperature for 8-12 hours. This process vitrifies the clay into strong, durable brick.
Cool and Unload
Allow kiln to cool slowly over 2-3 days. Rapid cooling causes cracking. Once cool, carefully unload finished bricks. They should have a reddish color and ring when struck.